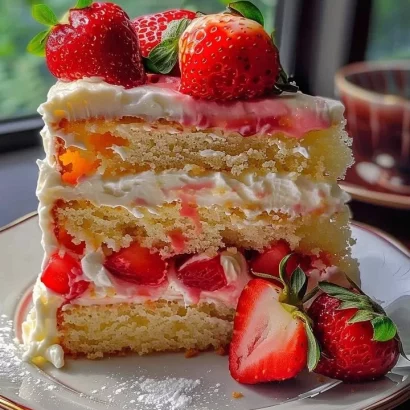
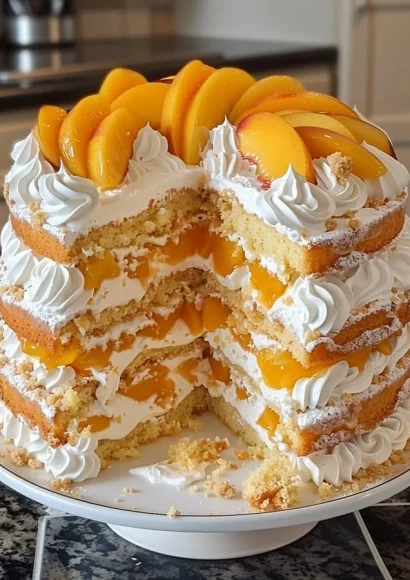
Peaches and Cream Layer Cake
Peaches and Cream Layer Cake is a delightful dessert that combines the sunshine sweetness of fresh, juicy peaches with the fluffy whipped cream for an experience that’s mouthwateringly delicious. This cake brings together soft layers of cake and refreshing cream, creating a nostalgic treat that will remind you of summer gatherings and family celebrations. With its light and airy texture, this dessert is sure to become your go-to recipe for special occasions or simply when you want to brighten up your day. Join me in this step-by-step adventure of baking a cake that’s not only simple but also immensely satisfying to make!
Why You’ll Love This Recipe
This Peaches and Cream Layer Cake is a perfect balance of flavors and textures, making it a beloved choice among dessert lovers. One of the primary benefits of this recipe is its easy preparation; perfect for bakers of all skill levels. You won’t need any fancy equipment—just your trusty mixing bowls, a whisk, and an oven!
With relatively minimal ingredients, this cake is a crowd-pleaser that resonates with both children and adults alike. The luscious flavor of ripe peaches mixed with whipped cream elevates this cake from ordinary to extraordinary. Whether you’re hosting a summer picnic, celebrating a birthday, or simply indulging at home, you’ll find that this cake brings smiles with every slice!
Ingredients
- 2 cups all-purpose flour: This will form the base of your cake, providing structure and fluffiness.
- 1 1/2 cups granulated sugar: Sweetness is key to enhancing the other flavors.
- 1/2 cup unsalted butter, softened: Adds richness and a creamy texture that melts in your mouth.
- 1 cup milk: Moistens the cake, making each bite tender and delicious.
- 3 large eggs: Helps bind the ingredients together, contributing to a light texture.
- 2 teaspoons baking powder: Essential for leavening, which gives the cake that wonderful rise.
- 1 teaspoon vanilla extract: Infuses the cake with a warm, aromatic flavor.
- 1/2 teaspoon salt: Enhances the overall taste by balancing the sweetness.
- 1 cup heavy whipping cream: For the fluffy cream filling that is both indulgent and refreshing.
- 1/2 cup powdered sugar: Sweetens the whipped cream, making it a heavenly accompaniment.
- 3 ripe peaches, peeled and sliced: Juicy and fragrant, they are the star ingredient of this recipe.
- 2 tablespoons granulated sugar: For caramelizing the peaches slightly, enhancing their flavor.
- 1 tablespoon lemon juice: Adds a bit of brightness that balances the sweetness of the peaches.
Step-by-Step Directions
-
Preheat Your Oven: Start by preheating your oven to 350°F (175°C). This ensures that your cake will bake evenly.
-
Prepare Your Cake Pans: Grease and flour two 9-inch round cake pans. This prevents the cake from sticking and allows for easy release once it’s baked.
-
Cream Together Butter and Sugar: In a large mixing bowl, cream together the softened butter and granulated sugar until the mixture is light, fluffy, and pale in color. This step is crucial for achieving the right texture.
-
Add Eggs: Incorporate the eggs one at a time, beating well after each addition. This process helps to incorporate air, creating a lighter texture.
-
Mix in Vanilla: Pour in the vanilla extract and mix until combined, filling your kitchen with a delightful aroma.
-
Combine Dry Ingredients: In a separate bowl, whisk together the flour, baking powder, and salt. This step aerates the flour and evenly distributes the leavening agent.
-
Alternate Dry Ingredients & Milk: Gradually add the dry mixture to the creamed butter mixture, alternating with the milk. Start and end with the dry ingredients, mixing until smooth without overworking the batter.
-
Divide Batter into Pans: Evenly divide the batter between the two prepared cake pans, smoothing the tops for an even bake.
-
Bake: Place the pans in the preheated oven and bake for 25-30 minutes, or until a toothpick inserted in the center comes out clean.
-
Cool the Cakes: Once baked, allow the cakes to cool in the pans for about 10 minutes before transferring them to wire racks to cool completely.
-
Prepare the Cream Filling: While the cake cools, whip the heavy cream in a mixing bowl until soft peaks form. Gradually add the powdered sugar and continue to whip until stiff peaks form, creating a luscious and fluffy whipped cream.
-
Prepare Peaches: In a small bowl, toss the peach slices with granulated sugar and lemon juice. Allow them to sit for a few minutes to draw out their juices.
-
Layer the Cakes: Once the cakes are completely cool, place one layer on a serving plate. Spread a generous layer of whipped cream over the top and top it with half of the peach slices.
-
Finish with Second Layer: Place the other cake layer on top and repeat the process. Spread the remaining whipped cream on top and arrange the remaining peach slices for a beautiful presentation.
Tips & Tricks
- Use Fresh Peaches: Choosing ripe, in-season peaches makes for the best flavor. If fresh peaches are unavailable, consider using good-quality canned peaches as an alternative.
- Chill the Whipping Cream: To ensure it whips up nicely, keep the whipping cream in the refrigerator until ready to use, and chill your mixing bowl for an extra boost.
- Add More Flavor: Experiment by adding a splash of almond extract to the batter for an additional layer of flavor.
Serving Suggestions & Pairings
This Peaches and Cream Layer Cake is perfect for summer picnics, birthday parties, or family gatherings. Serve it alongside a scoop of vanilla ice cream or with a drizzle of peach syrup for an extra treat. A refreshing glass of iced tea or lemonade pairs beautifully with this cake, complementing its lightness and fruity flavors.
Nutritional Information
One slice of Peaches and Cream Layer Cake contains approximately 400 calories. It provides a good balance of carbohydrates from the cake and healthy fats from the cream, making it an indulgent yet satisfying dessert. As always, moderation is key in enjoying treats.
Storing Tips & Variations
To store any leftovers, wrap the cake in plastic wrap and refrigerate for up to 3-4 days. You can also freeze the cake layers for later use—simply wrap each layer tightly in plastic wrap and then place it in an airtight container. If you want to get creative, try adding other fruits like strawberries or blueberries, or even a layer of lemon curd between the cake for a zesty twist!
Conclusion
I hope you feel inspired to whip up this delightful Peaches and Cream Layer Cake. It’s not only a treat for the taste buds but also an opportunity to share sweet moments with your loved ones. Give it a try, and don’t forget to share your experience and any twists you make with the recipe.
FAQs
1. Can I use frozen peaches instead of fresh?
Yes, you can use frozen peaches! Just ensure they are thawed and drained of excess moisture before using them.
2. Can I make this cake gluten-free?
Absolutely! Substitute the all-purpose flour with a gluten-free flour blend, ensuring that it contains a binding agent like xanthan gum for best results.
3. How can I make the cake more visually appealing?
Consider topping the cake with fresh mint leaves or edible flowers. This adds a pop of color and a lovely touch to the presentation.
4. What type of equipment do I need to bake this cake?
All you need is basic baking equipment: mixing bowls, a whisk or electric mixer, measuring cups, and two 9-inch round cake pans.
5. Can I prepare this cake in advance?
Yes! You can bake the cake layers a day ahead and assemble the cake the following day for easier preparation when you’re hosting or celebrating.
Peaches and Cream Layer Cake
Ingredients
Method
- Preheat your oven to 350°F (175°C).
- Grease and flour two 9-inch round cake pans.
- In a large mixing bowl, cream together the softened butter and granulated sugar until light and fluffy.
- Incorporate the eggs one at a time, beating well after each addition.
- Pour in the vanilla extract and mix until combined.
- In a separate bowl, whisk together the flour, baking powder, and salt.
- Gradually add the dry mixture to the creamed butter mixture, alternating with the milk. Start and end with the dry ingredients.
- Evenly divide the batter between the two prepared cake pans and smooth the tops.
- Bake for 25-30 minutes, or until a toothpick comes out clean.
- Allow the cakes to cool in the pans for 10 minutes before transferring to wire racks to cool completely.
- Whip the heavy cream until soft peaks form, then gradually add powdered sugar and whip until stiff peaks form.
- Toss the peach slices with granulated sugar and lemon juice.
- Once the cakes are cool, layer one on a serving plate, spread whipped cream over it, and top with half the peach slices.
- Add the second cake layer on top and repeat the process, finishing with whipped cream and remaining peaches.