
Homemade Moose Tracks Ice Cream
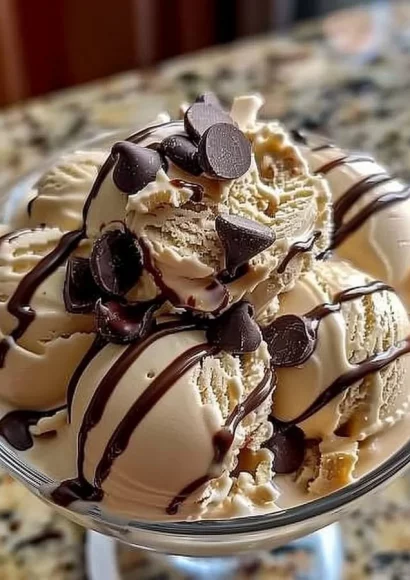
Homemade Moose Tracks Ice Cream is a delightful combination of creamy, rich flavors that can transport you right back to childhood summers. With its blend of luscious peanut butter cups and delectable swirls of chocolate, this ice cream tantalizes the taste buds and embraces the soul. This recipe provides a step-by-step guide, ensuring that you can easily recreate this decadent dessert in your own kitchen.
There’s something utterly special about making ice cream at home— the anticipation as it churns, the aromas filling your kitchen, and, most importantly, the joy of savoring a bowl of your handcrafted creation. Whether it’s a family gathering, a hot summer day, or simply a desire to indulge, this Moose Tracks Ice Cream serves as the ultimate sweet treat.
Why You’ll Love This Recipe
This Moose Tracks Ice Cream recipe is incredibly easy to prepare and combines ingredients that most people adore. With minimal steps and straightforward preparations, your family will love getting involved in the process. The recipe requires no fancy machinery—just an ice cream maker and some basic mixing equipment.
Additionally, the ingredients used are easily found in your pantry or local grocery store. This ice cream promises delightful satisfaction with every creamy bite, making it perfect for families or gatherings. Plus, it’s a versatile treat: serve it in cones, bowls, or even as an ice cream layer in cake!
Ingredients for Homemade Moose Tracks Ice Cream
To make this indulgent Moose Tracks Ice Cream, gather the following ingredients that create a perfect balance of sweet and savory:
- 1 gallon half-and-half: This creamy base gives your ice cream its rich consistency.
- 1 1/2 cups sugar: Sweetness in just the right amount to elevate the flavors.
- 1/2 cup light corn syrup: Helps create a smooth texture and adds sweetness.
- 1 tbsp vanilla extract: A splash of this will enhance the overall flavor profile.
- 1/2 tsp salt: Just a pinch to bring all the flavors together.
- 1 cup semisweet chocolate chips: These will melt to create a luscious ribbon of chocolate.
- 1 cup peanut butter cups, chopped: The star of this recipe, adding that beloved peanut butter flavor.
Step-by-Step Directions
Creating your own Homemade Moose Tracks Ice Cream requires just a few simple steps:
-
Mix Ingredients: In a large bowl, combine the half-and-half, sugar, corn syrup, vanilla extract, and salt. Whisk together until the sugar has completely dissolved, creating a perfectly blended mixture.
-
Churn the Base: Pour the mixture into an ice cream maker. Churn according to the manufacturer’s directions, which typically takes about 20-25 minutes. You’ll know it’s ready when it has thickened to a creamy texture.
-
Melt the Chocolate: While your ice cream is churning, melt the chocolate chips. This can be done over a double boiler or in the microwave—in 15-20 second intervals, stirring in between, until completely melted.
-
Swirl in Chocolate and Peanut Butter Cups: Once your ice cream is ready, gently swirl in the melted chocolate and the chopped peanut butter cups. Ensure even distribution for that delightful mix of flavors in each scoop.
-
Freeze and Enjoy: Transfer the ice cream into an airtight container and freeze for at least 4 hours or until it is firm enough to scoop. Once ready, serve this creamy, chocolatey, and peanut-buttery masterpiece and let your taste buds rejoice!
Tips & Tricks
Here are a few chef’s secrets to perfecting your Homemade Moose Tracks Ice Cream:
- Prevent Ice Crystals: To ensure a creamy texture, stirring or churning your ice cream regularly while freezing helps prevent ice crystals from forming.
- Flavor Variations: Experiment with different flavored chocolate (white or dark) or even add in additional treats like crushed cookies or caramel swirls.
- Keep it Smooth: If you prefer a lighter texture, add a cup of cream to your half-and-half mixture for extra creaminess.
- Sweetness Level: Adjust the sugar level to your preference; taste as you mix to find the perfect sweet spot!
Serving Suggestions & Pairings
Elevate your Homemade Moose Tracks Ice Cream experience with these creative serving ideas:
- Classic Sundae: Top your scoop with whipped cream, a cherry, and an extra drizzle of chocolate sauce for the classic sundae experience.
- Ice Cream Sandwich: Use your favorite cookies to create delicious ice cream sandwiches—chocolate chip cookies work particularly well!
- Milkshake Bliss: Blend a scoop of your ice cream with milk for a luscious milkshake, perfect for a refreshing drink on a hot day.
- Layered Treats: Create an ice cream cake by layering the Moose Tracks Ice Cream between chocolate or vanilla cake layers. Top it with ganache for an impressive dessert!
Nutritional Information
While indulging in this Moose Tracks Ice Cream, keep in mind that it is a rich treat. A standard serving (1/2 cup) typically contains approximately:
- Calories: 300
- Total Fat: 17g
- Saturated Fat: 8g
- Carbohydrates: 36g
- Sugars: 28g
- Protein: 5g
This dessert is certainly an indulgence, but it’s perfect for a special occasion or a delicious treat after dinner!
Storing Tips & Variations for Homemade Moose Tracks Ice Cream
To keep your Moose Tracks Ice Cream fresh and delicious, adhere to these storing guidelines:
- Freezing: Store the ice cream in an airtight container to prevent it from absorbing other smells in your freezer. A good seal will also keep it from developing ice crystals.
- Sharing & Gift Giving: This homemade ice cream makes a fantastic gift, either in small containers or as part of a sundae kit.
- Healthier Swaps: For a lighter version, consider using low-fat half-and-half or sugar substitutes. Alternatively, you can swap out peanut butter cups for banana pieces or nuts.
- Flavor Variants: Consider adding a swirl of your favorite jam or caramel sauce to create a new flavor of Moose Tracks!
Conclusion for Homemade Moose Tracks Ice Cream
Homemade Moose Tracks Ice Cream is more than just a dessert; it’s a canvas for creativity, a source of comfort, and a delightful treat that brings friends and family together. Its easy preparation makes it a great recipe for any occasion. Don’t wait any longer—gather your ingredients, follow this step-by-step guide, and indulge in the creamy, chocolaty goodness that is sure to become a favorite in your home!
FAQs
1. Can I use whole milk instead of half-and-half?
Yes, you can, but using half-and-half gives your ice cream that extra creamy texture. If you use whole milk, consider adding a bit of cream to compensate.
2. How do I ensure my ice cream doesn’t turn icy?
Churning the ice cream for the right amount of time and keeping it stored properly in an airtight container will prevent ice crystals from forming.
3. Can I make this recipe without an ice cream maker?
While an ice cream maker offers the best results, you can freeze the mixture in a container and stir it every 30 minutes until it firms up. This method takes longer but will still result in a delicious treat.
4. How long does Homemade Moose Tracks Ice Cream last in the freezer?
Typically, it lasts up to 2-3 months when stored properly in an airtight container. However, it’s best enjoyed fresh within the first few weeks.
5. How can I make it more peanut buttery?
To intensify the peanut butter flavor, add an extra spoonful of peanut butter to the base mixture before churning. You can also add larger chunks of peanut butter cups or drizzle extra peanut butter into the mixture before freezing.

Homemade Moose Tracks Ice Cream
Ingredients
Method
- In a large bowl, combine the half-and-half, sugar, corn syrup, vanilla extract, and salt. Whisk together until the sugar has completely dissolved.
- Pour the mixture into an ice cream maker. Churn according to the manufacturer’s directions, about 20-25 minutes.
- While your ice cream is churning, melt the chocolate chips over a double boiler or in the microwave in 15-20 second intervals, stirring in between.
- Once your ice cream is ready, gently swirl in the melted chocolate and the chopped peanut butter cups.
- Transfer the ice cream into an airtight container and freeze for at least 4 hours or until it is firm enough to scoop.

