
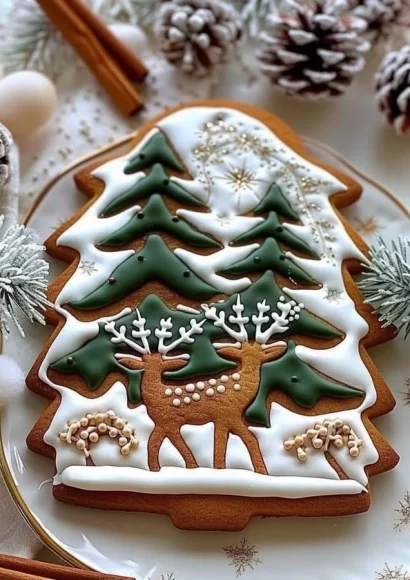
Gingerbread Cookies with Winter Forest Design
The enchanting aroma of warm spices fills the air as you embark on a delightful culinary adventure with Gingerbread Cookies with Winter Forest Design. This recipe invites you to create beautifully decorated cookies that not only satisfy your sweet tooth but also bring a festive touch to your gatherings. With each bite, the rich flavors of molasses, ginger, and cinnamon dance on your palate, evoking memories of winter celebrations, cozy gatherings, and nostalgic moments shared with loved ones. Follow this step-by-step guide and immerse yourself in the art of cookie-making, where tenderness and creativity unite to create mouthwatering masterpieces.
History / Fun Fact
Gingerbread has a rich history that traces back centuries, with roots in ancient Greece and Egypt where honey and spices were used for medicinal and celebratory purposes. However, it became especially popular in the European Middle Ages, where the art of gingerbread-making flourished. Initially crafted as decorations, these spicy sweets were often shaped into intricate designs, especially during festive occasions. Gingerbread cookies transitioned into a cherished holiday tradition, especially in Germany, where they began to be baked and enjoyed during Christmastime. Imagine the joy of children and families as they hang these fragrant masterpieces on trees, creating memories that last a lifetime.
Ingredients
To create your fantastic Gingerbread Cookies with Winter Forest Design, gather these essential ingredients:
- All-purpose flour (3 1⁄4 cups or 400g): This creamy staple forms the soft structure of your cookies.
- Baking soda (3⁄4 teaspoon): Light and airy, it ensures your cookies rise just right.
- Ground ginger (1 tablespoon): Aromatic and spicy, it adds warmth to each bite.
- Ground cinnamon (1 tablespoon): Sweet and fragrant, it transports you to winter markets.
- Ground cloves (1⁄4 teaspoon): Pungent and slightly sweet, it rounds out the spices harmoniously.
- Nutmeg (1⁄4 teaspoon): Earthy and nutty, it elevates the flavor profile.
- Salt (1/2 teaspoon): A dash of balance to enhance sweetness.
- Unsalted butter (1/2 cup or 115g, softened): Creamy and rich, it lends tenderness to the dough.
- Brown sugar (1/2 cup or 100g, packed): Sweet and caramelized, it deepens the cookie’s flavor.
- Large egg (1): Binding and enriching, it brings everything together.
- Unsulfured molasses (2⁄3 cup or 160ml): Lustrous and dark, it imparts depth and moisture.
- Pure vanilla extract (1 teaspoon): Sweet and fragrant, it elevates all the flavors.
- Powdered sugar (3 cups or 360g): Fluffy and sweet, it’s perfect for the royal icing.
- Egg whites (2 large or 3 tablespoons meringue powder mixed with 6 tablespoons water): Whipped to create a beautiful icing structure.
- Vanilla or almond extract (1/2 teaspoon): A fragrant addition to the icing.
- Gel food coloring (green, white, brown, and optional blue): Vibrant colors for the winter forest theme.
- Edible gold dust (optional for the deer): A touch of elegance.
- Fine sugar or edible glitter for snow effect: Sparkling elegance to mimic a winter wonderland.
- Piping bags and small piping tips: Tools for creating detailed designs.
Ensure that all these ingredients are halal-friendly, allowing you to enjoy the full experience with peace of mind.
Cooking Time & Tips For Gingerbread Cookies with Winter Forest Design
Prepare to dive into a baking experience that can be both quick and leisurely. If you’re in a rush, you can whip up the cookie dough in about 30 minutes, allowing an hour of chilling time before baking. However, taking your time enhances flavors and gives you the chance to revel in the joy of cookie decorating. An excellent tip for your gingerbread cookies is to chill the dough well. Chilling not only makes rolling easier but also helps maintain the shape of your intricately cut cookies during baking.
For success, use high-quality molasses and fresh spices. Measure your ingredients precisely, as baking is a science that relies on the correct proportions. Ensure your butter is at room temperature for easy creaming with sugar, creating a delightful texture. Finally, allow the decorated cookies ample time to set so the icing hardens perfectly for presentation.
Step-by-Step Directions
-
Begin your journey by whisking together all-purpose flour, baking soda, ground ginger, cinnamon, cloves, nutmeg, and salt in a medium-sized bowl. Let it stand aside, as these ingredients will perfectly complement the rich flavors to come.
-
In a large bowl, cream the softened butter and brown sugar together until the mixture is light and fluffy, filling the room with a delicious aroma. To this symphony, introduce the egg, molasses, and vanilla extract, mixing until completely combined.
-
Gradually add the dry mixture into the wet ingredients, stirring gently until a soft dough emerges. If the dough feels overly sticky, don’t hesitate to incorporate a little more flour until it’s firm enough to manage comfortably.
-
Divide the dough into two portions, lovingly wrapping each in plastic wrap. Chill them in your refrigerator for at least an hour. This step may seem small, but it’s crucial for achieving crisp, beautifully shaped cookies.
-
Preheat your oven to 350°F (175°C), filling your space with warmth and anticipation. Line baking sheets with parchment paper, readying your baking surface.
-
On a lightly floured surface, roll out one portion of dough to about 1⁄4-inch thickness. Playfully use cookie cutters to cut out delightful shapes: think trees, deer, and snowflakes that capture the essence of a winter forest.
-
Place the cookie cutouts onto your prepared baking sheets, then slide them into the oven to bake for 8-10 minutes or until the edges are lightly golden. Your kitchen will soon fill with a nostalgic aroma of ginger and spices.
-
Let the cookies cool on the sheets for a few minutes, allowing them to firm up before transferring them to a wire rack to cool completely. This step is crucial, as it prevents any premature breakage from cooling too quickly.
-
Next, prepare the royal icing! Beat the egg whites (or meringue powder mixture), until stiff peaks form. Gradually introduce powdered sugar and vanilla extract, continuing to beat until the icing achieves a smooth and stiff consistency.
-
Divide the icing into small bowls and mix in gel food coloring to achieve the vibrant hues for your designs—green for trees, brown for deer, white for snow, and an optional blue for the sky.
-
Armed with piping bags fitted with small tips, elegantly pipe the royal icing onto your cookies. Let your creativity flow as you craft intricate winter forest designs, bringing your cookie scene to life.
-
Finish your masterpieces by dusting edible gold dust on the deer, and sprinkle fine sugar or edible glitter for that enchanting snow effect, creating a visual feast that will mesmerize anyone who sees them.
-
Allow your beautifully decorated cookies to dry completely before presenting or packaging them. This step ensures that your artwork remains intact, ready to be admired and enjoyed.
Serving Suggestions & Occasions
Gingerbread Cookies with Winter Forest Design are perfect for a myriad of occasions: from cozy family gatherings to festive holiday parties, these cookies make for an excellent gift or dessert centerpiece. Delight your guests at Christmas parties by serving them alongside hot cocoa or spiced chai, enhancing the warm ambiance. You could also package them in decorative boxes for lovely homemade gifts that spread joy and warmth. These cookies can serve as both delightful treats and beautiful decorations, making them a double-win for your holiday festivities.
Common Mistakes For Gingerbread Cookies with Winter Forest Design
One common mistake when baking gingerbread cookies is not chilling the dough sufficiently. As previously mentioned, this step is essential to keeping the cookie shapes intact, so never skip it! Overbaking is another pitfall: keep an eye on your cookies as they bake to ensure they don’t turn crunchy unless that’s the texture you desire. Not measuring ingredients accurately can lead to dense cookies, so investing in a kitchen scale for precision can make a world of difference. Lastly, be patient with the royal icing; rushing the drying process can result in smudged designs.
Healthier Alternatives & Variations
If you want to lighten your recipe, consider reducing the sugar in the dough or substituting part of it with honey or maple syrup. For a twist, you can use whole wheat flour instead of all-purpose flour for added nutrition and a nuttier flavor. Want to switch things up? Experiment with spices like cardamom or add citrus zest for a unique flavor profile. You could also make gluten-free gingerbread cookies by substituting the all-purpose flour with a gluten-free blend, ensuring that everyone can enjoy them.
FAQs
1. Can I freeze the gingerbread cookie dough?
Absolutely! After chilling, wrap the dough tightly in plastic and store it in the freezer. It keeps well for up to 3 months.
2. How can I prevent my cookies from spreading?
Make sure to chill the dough before rolling it out and keep it cool while baking.
3. Can I use store-bought icing instead of royal icing?
While you can, royal icing is best for decorating due to its ability to hold shape and allow for fine designs.
4. How long do these cookies stay fresh?
When stored in an airtight container at room temperature, they last about one week. For longer storage, consider freezing them.
5. Can I bake these cookies without cutting them into shapes?
Yes! You can roll them into balls and bake them, then frost after cooling if you prefer.
6. What is the best way to decorate these cookies?
Set up a decorating station with various colored icings, edible glitter, and toppings. Let your imagination run wild!
Tempted to try this delightful Gingerbread Cookies with Winter Forest Design? With their enchanting flavors and festive charm, these cookies are sure to evoke a sense of wonder and celebration. Gather your ingredients, follow the step-by-step guide, and let the magic of baking fill your home with joy. You’ll not only create a delicious treat but also beautiful memories to cherish for years to come! Let the cookie-making adventure begin!
Gingerbread Cookies with Winter Forest Design
Ingredients
Method
- Whisk together all-purpose flour, baking soda, ground ginger, cinnamon, cloves, nutmeg, and salt in a medium-sized bowl and set aside.
- In a large bowl, cream together the softened butter and brown sugar until light and fluffy.
- Add the egg, molasses, and vanilla extract to the butter-sugar mixture and mix until combined.
- Gradually add the dry mixture into the wet ingredients, stirring gently until a soft dough forms. Incorporate more flour if the dough is sticky.
- Divide the dough into two portions, wrap in plastic wrap, and chill in the refrigerator for at least an hour.
- Preheat the oven to 350°F (175°C) and line baking sheets with parchment paper.
- Roll out one portion of dough on a lightly floured surface to about 1/4-inch thickness and cut out shapes using cookie cutters.
- Place cutouts onto prepared baking sheets and bake for 8-10 minutes or until edges are lightly golden.
- Let cookies cool on sheets for a few minutes before transferring them to a wire rack to cool completely.
- Prepare the royal icing by beating egg whites (or meringue mixture) until stiff peaks form.
- Gradually mix in powdered sugar and vanilla extract until the icing is smooth and stiff.
- Divide icing into small bowls and mix in gel food coloring to achieve desired colors.
- Use piping bags to pipe the royal icing onto cooled cookies, creating winter forest designs.
- Dust edible gold dust on the deer and sprinkle fine sugar or edible glitter for the snow effect.
- Allow decorated cookies to dry completely before serving or packaging.

