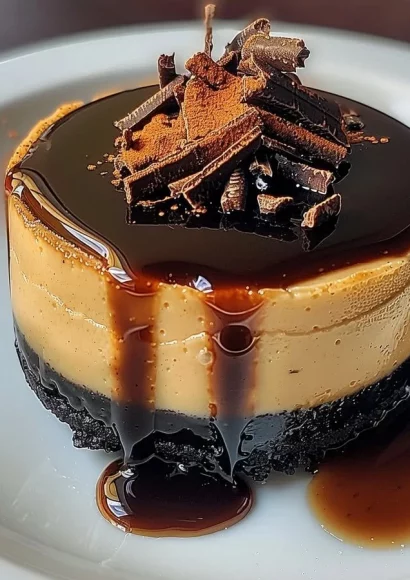
Mini Espresso Cheesecake Desserts
Imagine stepping into a cozy café, the warm aroma of freshly brewed coffee enveloping you like a comforting embrace. Now, picture that delightful experience transformed into a small, decadent treat—Mini Espresso Cheesecake Desserts. This step-by-step recipe invites you into a world where rich, creamy texture meets the bold flavor of espresso, creating a harmony of taste that dances on your palate. Whether you’re serving them at a party or indulging in a sweet moment just for yourself, these little delights will surely spark joy and satisfaction.
History / Fun Fact
Cheesecake has a long and storied history, with its roots tracing back to ancient Greece. The first recorded recipe can be found in the writings of Athenaeus, a Greek philosopher, from around 230 AD. As time went on, European cultures began to adopt and adapt this beloved dessert, evolving it into the varieties we cherish today. The incorporation of coffee into cheesecakes, however, gained prominence much later, particularly during the 20th century when coffee culture began to flourish globally. Today, combining espresso with creamy cheesecake not only pays tribute to its historical roots but also celebrates the modern love for the robust flavor of coffee.
Ingredients
- 1 cup graham cracker crumbs: These aromatic crumbs provide a buttery crunch that serves as the perfect base for your cheesecake.
- 1/4 cup granulated sugar: This sweet touch adds a delightful balance to the crust and the creamy filling.
- 1/2 cup unsalted butter, melted: The rich, smooth butter binds the crust together and adds depth to its flavor.
- 16 ounces cream cheese, softened: This is the star of the show, lending a creamy, luxurious texture that melts in your mouth.
- 1 cup powdered sugar: This sweetener ensures the cheesecake is perfectly sweet without being overwhelming.
- 1 tablespoon vanilla extract: A fragrant addition that enhances the overall flavor profile, bringing warmth and sweetness.
- 2 tablespoons espresso or strong coffee, cooled: The bold, aromatic hit of espresso elevates the entire dessert, adding a sophisticated edge.
- 2 large eggs: These help set the cheesecake, creating that dense, velvety texture we all adore.
- Whipped cream for topping: A light, airy contrast that makes each bite feel indulgent.
- Chocolate shavings or cocoa powder for garnish: These finishing touches add beauty and a hint of chocolaty richness.
Cooking Time & Tips For Mini Espresso Cheesecake Desserts
When it comes to preparing these Mini Espresso Cheesecake Desserts, you can opt for either a quick or a slow approach. Quick preparation means gathering your ingredients and following the steps without pausing to savor the moment. Alternatively, the slow method allows for a more immersive experience, where you take the time to appreciate each ingredient and the beautiful process of creating something special.
Practical tips for success include making sure your cream cheese is fully softened to avoid lumps and ensuring that the espresso is at room temperature, as this prevents the eggs from cooking prematurely. Prepping your ingredients ahead of time can also streamline the process and make baking feel more like a leisurely activity rather than a race against the clock.
Step-by-Step Directions
-
Preheat the oven to 325°F (160°C). The gentle warmth will be crucial as you create these delicious cheesecakes.
-
Line a muffin tin with paper liners. This step ensures that your cheesecakes don’t stick, making for an effortless serving experience and a clean presentation.
-
In a medium bowl, combine the graham cracker crumbs, granulated sugar, and melted butter. The mixture should resemble wet sand, with a luscious aroma that fills the air.
-
Mix until well combined. Use your hands if necessary—there’s something satisfying about feeling the texture as you create your crust.
-
Press about 1 tablespoon of the crumb mixture into the bottom of each muffin liner. Use the back of a spoon to pack it tightly, forming a sturdy foundation for your cheesecake.
-
In a large mixing bowl, beat the cream cheese until smooth. The creamy texture should be inviting—don’t rush this step, as it sets the stage for a velvety filling.
-
Gradually add the powdered sugar, mixing until fully incorporated. You’ll notice the sweetness coming to life; taste a tiny bit if you dare!
-
Add the vanilla extract, cooled espresso, and eggs, mixing just until combined and smooth. The aromatic espresso will weave its richness through the creamy ingredients, making your mouth water.
-
Pour the cheesecake batter over the crust in each muffin liner, filling them about 3/4 full. Watching the rich mixture pour is like watching a beautiful sunset; you won’t want to rush it.
-
Bake for 20-25 minutes, or until the centers are set. The anticipation builds as they transform into golden, puffed little beauties.
-
Let cool in the pan for 10 minutes before transferring them to a wire rack to cool completely. The aromas wafting from the oven will make it hard to resist sneaking a taste.
-
Once cooled, chill in the refrigerator for at least 2 hours. This allows the flavors to meld beautifully, creating a dessert you’ll crave time and again.
-
Serve topped with whipped cream and garnished with chocolate shavings or dusted with cocoa powder. Each dessert now looks like a tiny celebration on a plate.
Serving Suggestions & Occasions
Mini Espresso Cheesecake Desserts are incredibly versatile. They shine at events that call for finger foods, such as brunches or cocktail parties. Pair them with a rich cup of coffee or espresso to elevate the experience further. They also make a delightful ending to a cozy dinner at home, especially on lazy weekend nights. Consider presenting them on a beautiful platter, garnished with fresh berries or additional chocolate to entice your guests and create a stunning visual display.
Common Mistakes For Mini Espresso Cheesecake Desserts
One of the most common mistakes is overmixing the cheesecake batter, which can lead to cracks on the surface once baked. Always mix until just combined, ensuring a smooth texture without incorporating too much air. Another mistake to avoid is skipping the chilling step; this is essential for achieving the perfect set and enhancing the flavors. Lastly, paying close attention to the baking time is crucial. Overbaking can turn your luscious cheesecakes into dry, rubbery desserts—keep an eye on them!
Healthier Alternatives & Variations
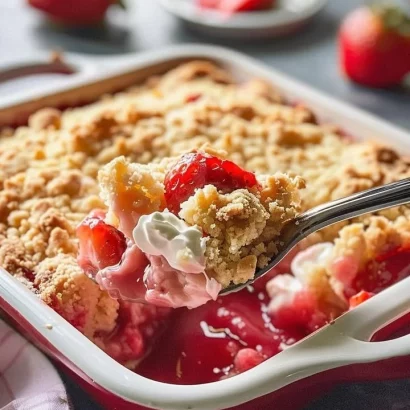
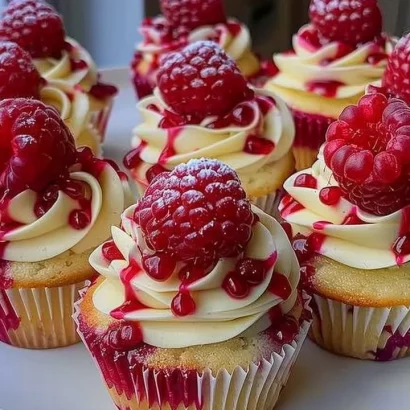
For those looking for a healthier twist, consider using low-fat cream cheese or a dairy-free alternative. You can also sweeten your filling with natural sweeteners like honey or maple syrup instead of granulated sugar. For variations, experiment with different flavors of espresso or swap out the espresso for a rich fruit puree, like raspberry or strawberry, for a vibrant take on the classic cheesecake. A dash of almond extract instead of vanilla can also add an intriguing twist to the flavor profile.
FAQs
-
Can I make these cheesecakes ahead of time?
Yes! They can be made a day in advance and stored in the refrigerator. -
What if I don’t have espresso on hand?
Strong brewed coffee can be used as a substitute for espresso without compromising flavor. -
Can I freeze these cheesecakes?
Yes! They can be frozen before garnishing for up to three months. Just make sure to wrap them tightly. -
What type of pan should I use?
A regular muffin tin works best for the mini size, but a silicone muffin tray is a great alternative for easy removal. -
Can I add chocolate to the batter?
Absolutely! Adding melted dark chocolate or cocoa powder can create a delicious mocha flavor. -
How long should I chill them?
For best results, chill for at least two hours, but overnight is even better!
Conclusion
Every bite of Mini Espresso Cheesecake Desserts encapsulates the comforting essence of coffee culture combined with the luxurious smoothness of cheesecake. This step-by-step recipe isn’t just a guide; it invites you to experience the joy of baking and create something truly delightful. So gather your ingredients, roll up your sleeves, and let the aromas lead you on a sweet adventure. Once you’ve tasted these little wonders, you’ll find yourself craving them for every occasion—be prepared to make a double batch for sharing (or not)!
Mini Espresso Cheesecake Desserts
Ingredients
Method
- Preheat the oven to 325°F (160°C).
- Line a muffin tin with paper liners.
- In a medium bowl, combine graham cracker crumbs, granulated sugar, and melted butter until the mixture resembles wet sand.
- Press about 1 tablespoon of the crumb mixture into the bottom of each muffin liner.
- In a large mixing bowl, beat the cream cheese until smooth.
- Gradually add powdered sugar, mixing until fully incorporated.
- Add vanilla extract, cooled espresso, and eggs, mixing just until combined and smooth.
- Pour the cheesecake batter over the crust in each muffin liner, filling them about 3/4 full.
- Bake for 20-25 minutes, or until the centers are set.
- Let cool in the pan for 10 minutes before transferring them to a wire rack to cool completely.
- Once cooled, chill in the refrigerator for at least 2 hours.
- Serve topped with whipped cream and garnished with chocolate shavings or dusted with cocoa powder.